Publishing from blogdown to GitHub with Travis
Yihui Xie’s new blogdown package is a brilliantly elegant and simple tool for creating R-themed blogs and web sites. Starting your own blog is as simple as one line of R code:
blogdown::new_site()
By default, blogdown uses Hugo, a static web site generator written in Google’s Go programming language. This has a number of advantages over Jekyll (the site generator that powers GitHub Pages) and from personal experience, everything just seems to work more smoothly.

Previously I wrote about automatically deploying an R Markdown Jekyll blog with Travis. In this post, I am going to explain how you can use Travis to knit your R Markdown blog posts, then publish them with Hugo/blogdown.
Why Travis? In the official blogdown documentation, Yihui recommends Netflify, a rival service, instead. However, for the time being at least, Netlify doesn’t have R support. This means that any R Markdown (vs plain Markdown) posts you write will need to be built locally before pushing them to your Git repository, and therefore you can only maintain R-infused content from a computer with R + blogdown installed.
In an ideal world, you should be able to create content from any computer (or device) that has a web browser. Therefore we will push plain text to Git and have Travis compile all the R chunks for us, then automatically push the built site to GitHub Pages.
A few weeks ago Neal Richardson published a post on a similar topic, but that guide is a bit more complicated than it needs to be, because it doesn’t take advantage of Travis’s native GitHub Pages support.
You should be able to get up and running extremely quickly, with minimal Git knowledge required. Want to see a fully working example? Take a look at this site’s GitHub repository. For a minimal (non-Travis) blogdown site, see this example site.
Getting started
Install blogdown with
devtools::install_github('rstudio/blogdown')
then, in an empty folder, create a site.
blogdown::new_site()
For a crash course in blogdown and Git for beginners, read my post Getting started with blogdown. More complete information is available in the official blogdown book as well as the online Hugo documentation.
Want a web site that looks like mine? Run
blogdown::install_theme('Selbosh/hugo-tea')
then switch your theme to hugo-tea in your config.toml file.
Linking GitHub to Travis
This follows my earlier guide.
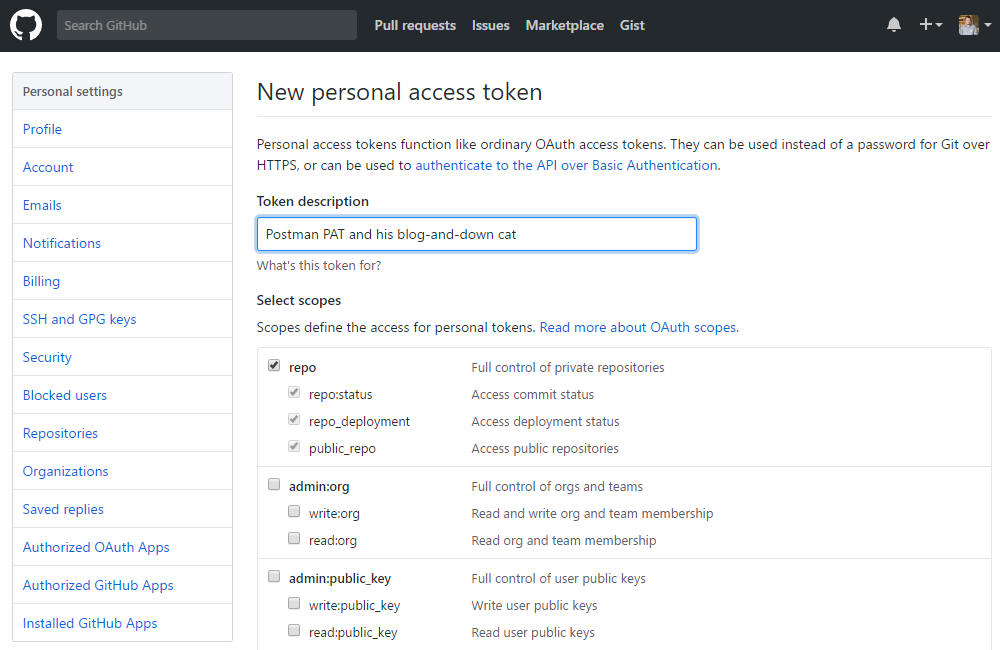
Create a GitHub personal access token, making sure the “repo” box is ticked so it has permission to push to repositories. Copy the token to your clipboard.
On Travis, enable the GitHub repository corresponding to your blogdown site. In Settings, create a new environment variable called GITHUB_PAT and paste your token into the Value field.

Configuring Travis
In the root of your directory, create a file called .travis.yml containing the following.
language: r
cache: packages
branches:
    only:
        - source
r_github_packages:
    - rstudio/blogdown

before_script:
    - Rscript -e 'blogdown::install_hugo(version = "0.20.7")'

script:
    - Rscript -e 'blogdown::build_site()'

deploy:
    provider: pages
    skip_cleanup: true
    github_token: $GITHUB_PAT
    on:
        branch: source
    local_dir: public
    target_branch: master
If you are hosting your site on username.github.io—like my site—there is no need to change any of the settings above.
You push your code to a branch called source and the compiled site is deployed to master.
If, instead, you have a Project Page (i.e. if the repository is called anything other than username.github.io), you can replace source with master and master with gh-pages. Or just leave it how it is—just make sure your repo settings have the target_branch set as the “Source” for GitHub Pages.
Travis’s R environment was originally designed for testing R packages, not building web sites.
As a result, Travis will complain if it doesn’t find a DESCRIPTION file—the minimum requirement of an R package—in your repository.
It is enough to add a placeholder DESCRIPTION file with the following arbitrary contents:
Package: arbitrary
Title: Does not matter.
Version: 0.0.1
This is enough to convince Travis to proceed.
Get publishing
Now, when you push a new commit to the source branch of your GitHub repository, Travis will clone it, build the site and push it to the master branch.
In my experience it takes about two minutes from pushing changes to the updated site being live.
If you have nothing better to do then you can watch Travis as it tries to deploy your blog. There’s no need to monitor it, though: if it fails for any reason, you’ll receive an e-mail.

Hopefully this guide helps. If you have any questions or feedback, feel free to leave a comment below or contact me.